Getting and Installing the Vpn Client
First, Download the VPN Client VPN Client
Click Here Enter your user name and password, select Login from the Dorpdown list then download your profile (Yourself (user-locked profile)) found at the bottom of the page
Once the file is downloaded select Import File from the OpenVpn Cleint. Once the Profile is imported, login to the VPN normally.
Next download the Softphone at: Softphone
Next Download Remote Support
Once you have downloaded and installed all the applications you will need run the RemoteSupport application, call the office and ask for assistance completing the remaining configuration
Logging In
After the installation is complete, use the Username and password provided to login to the VPN, start the softphone which you should have previously installed and configured using the information provided to you, login to the Terminal Server using Remote Desktop Connection, start the Agent program and start answering client calls.
Below you will find a brief description of how to use the VPN Client.
- Using the credentials provide you by the communications center, login to the VPN server and download your security certificates. The address of the Server will be provided to you with your credentials.
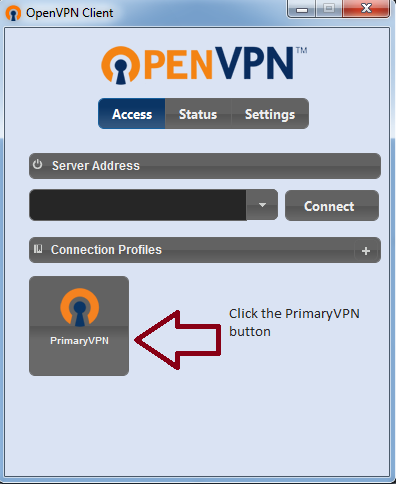
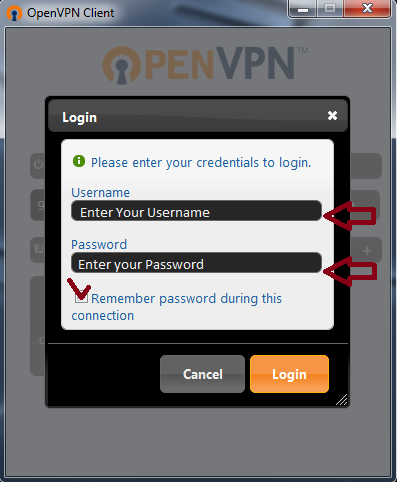
- Be sure to observe capitalization as the Username and password are case sensitive. Insure you place a checkmark in the "Remember password during this connection" checkbox, .
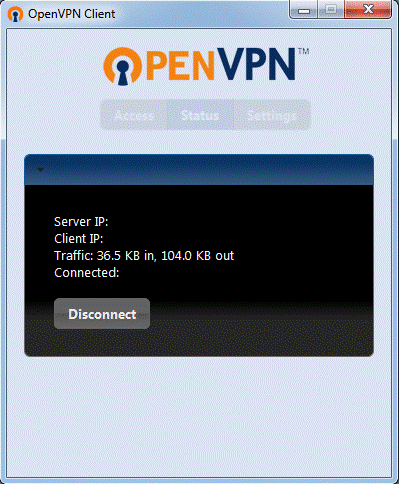
- Once you have entered your username and password correctly, and clicked the Login button, the client will show the process of Logging in, and obtaining an IP address. You will then be presented with a dialog informing you of the Server IP, your Client IP, the traffic that is being sent over the VPN tunnel, and the Status of your connection.
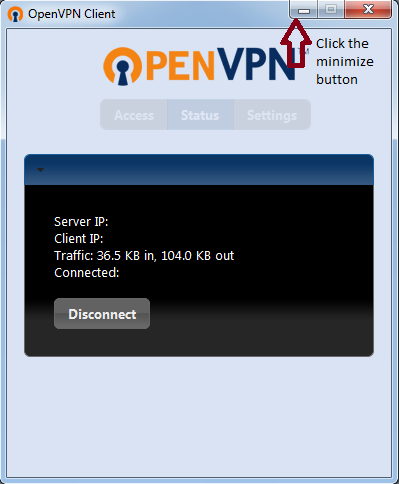
- You can now safely Minimize the OpenVPN Client to the Notification Area of the task bar by clicking the Minimize button. Next you will open your soft phone, connect to a station Audio, start your Terminal Server Session using Remote Desktop Connection, sign in to Agent and begin taking client calls.
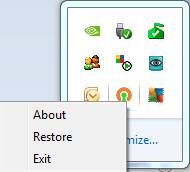
- When you are done answering client phone calls, Sign out of Agent, LOG OFF the Terminal Server, Disconnect and close your Soft phone, Click the OpenVPN Client ICON in the Notification Area of the Taskbar. Select Restore from the context menu.
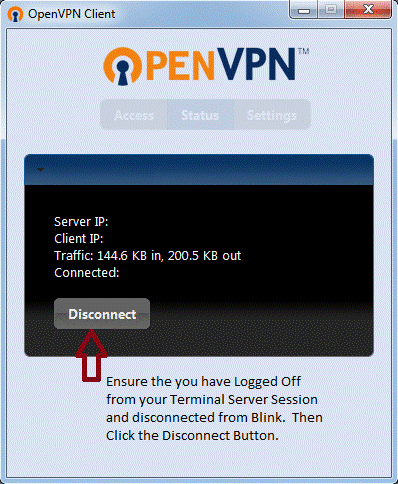
- Click the Disconnect button.
Back-up VPN Connection
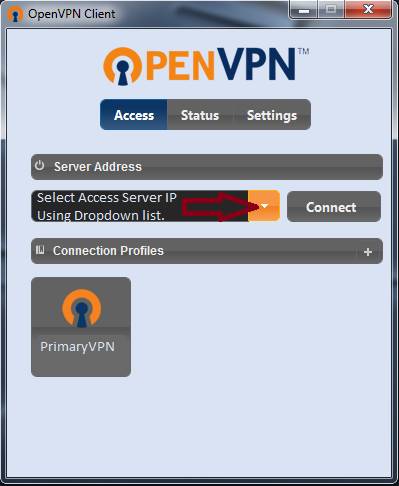
- Enter the IP address of the Access Server in the Space provided as shown in the image to the left. If you have previously used the Back-up VPN you will be able to select it from the dropdown list. Then click the "Connect" Button.
- Be sure to observe capitalization as the Username and password are case sensitive. Insure you place a checkmark in the "Remember password during this connection" checkbox

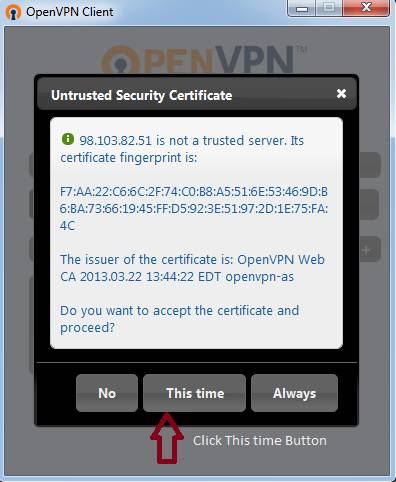
- Click the This time button to accept the Security Certificate.
- Once you have entered your username and password correctly, and clicked the Login button, the client will show the process of Logging in, and obtaining an IP address. You will then be presented with a dialog informing you of the Server IP, your Client IP, the traffic that is being sent over the VPN tunnel, and the Status of your connection.

- You can now safely Minimize the OpenVPN Client to the Notification Area of the task bar by clicking the Minimize button. Next you will open your soft phone, connect to a station Audio, start your Terminal Server Session using Remote Desktop Connection, sign in to Agent and begin taking client calls.

- When you are done answering client phone calls, Sign out of Agent, LOG OFF the Terminal Server, Disconnect and close your Soft phone, Click the OpenVPN Client ICON in the Notification Area of the Taskbar. Select Restore from the context menu.

- Click the Disconnect button.


